Free tourist information materials about Daugavpils, Daugavpils district, as well as other regions and cities in Latvia in different languages – Latvian, Russian, English, Lithuanian, Polish, German, etc. are available at Daugavpils Tourist Information Centre (22a Rigas Street). Here you can get tourist maps and useful information about upcoming events and activities. Visitors of the Tourist Information Centre have access also to Lithuanian tourism information.
Also in Daugavpils Fortress Culture and Information Centre (5 Nikolaja Street), you can receive free tourist information and fortress maps.
Press here to book a guided tour.
Information on the website can be searched through separate sections or by entering keywords or phrases in the search box and the desired results will be displayed.
When clicking on the “EVENTS” section, select the date and category of the event, then press the “SEARCH” button. Events that take place during the selected time period will be displayed.
STEP 1: ADD A TOURIST SPOT
In order to add a tourist spot to the route planner, open the selected tourist attraction and click the button “Add to the route” next to the description of the object (see Appendix 1).

(Appendix 1)
STEP 2: VIEW SELECTED ATTRACTIONS ON MAP
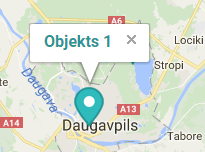
When there is at least one tourism spot added to the route planner, you can view it on an interactive map. It is recommended to have at least two spots. To open an interactive map, click on the Route planner icon on the homepage or at the page of tourism spot on the website (see Appendix 2).

(Appendix 2)
STEP 3: ARRANGE AND SELECT TOURISM ATTRACTIONS
When you open your route planner, you will see all previously added tourist attractions on the interactive map. Below the map, there is a list of tourist attractions that can be used for two activities. First, you can make a change in the order of the given object, by moving the mouse cursor over a particular list of objects, pressing and dragging it. Second, you can remove the tourist spot from the list by pressing the red cross in front of the object’s name (see Appendix 3). Note: Clicking on the cross will remove the object from the list of tourist attraction only, it will remain on the map, and updating the page will allow you to modify the list without losing previously selected attractions. To remove a spot from your route at all, click on the spot on the interactive map, and then click on its name again, to open the tourist attraction page (see Appendix 4). When you open the tourist attraction page, click the “Remove from the route” button as it was done when adding the object to the route (see Appendix 5). These activities can be performed with all tourist spots in the list until the route is ready.

(Appendix 3)

(Appendix 4)

(Appendix 5)
STEP 4: ROUTE MAPPING
When all tourist spots are arranged in the list, the route can be displayed on an interactive map. To do this, click the “Show / Redraw route” button (see Appendix 6). Tourist attractions will be interconnected on the interactive map depending on the sequence of the previously created list of tourist attractions. (Note: The illustrated distance is computed using Google algorithm, which is based on the quality of the road surface and the fastest time of arrival from one spot to another).
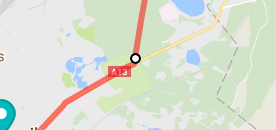
The route can be changed according to your needs. To change a section of the route, press on the red line and wait until a circle can be dragged to change the selected road section (see Appendix 7).

(Appendix 6)

(Appendix 7)
STEP 5: OPEN THE ROUTE WITH GOOGLE MAPS APPLICATION
When clicking the “Show / Redraw route” button, not only selected route is displayed but also an option to open the route on Google Maps application is offered, to proceed directly with the route through the application from the mobile device or computer.
To open Google Maps application, click the “Open Google Maps application” button (see Appendix 8).
Opening the route with the application allows for various modification options – editing the route itself or transferring to another device.
(Appendix 8)

